
Bulk Upload
You also have an option to upload products in bulk if you have multiple products to be uploaded simultaneously. Stock of your products includes price + inventory information. Catalog of your products includes all information of the product including description, pictures, features, warranty, make, model, prices and inventory information. You may want to upload either the stock of your products in bulk or multiple catalogs for your products in bulk.
How to add the catalog of my products in bulk?
To use bulk upload option for uploading the catalog, do as follows:
In the Admin Panel page, click Catalog>>Bulk Upload>>Catalog
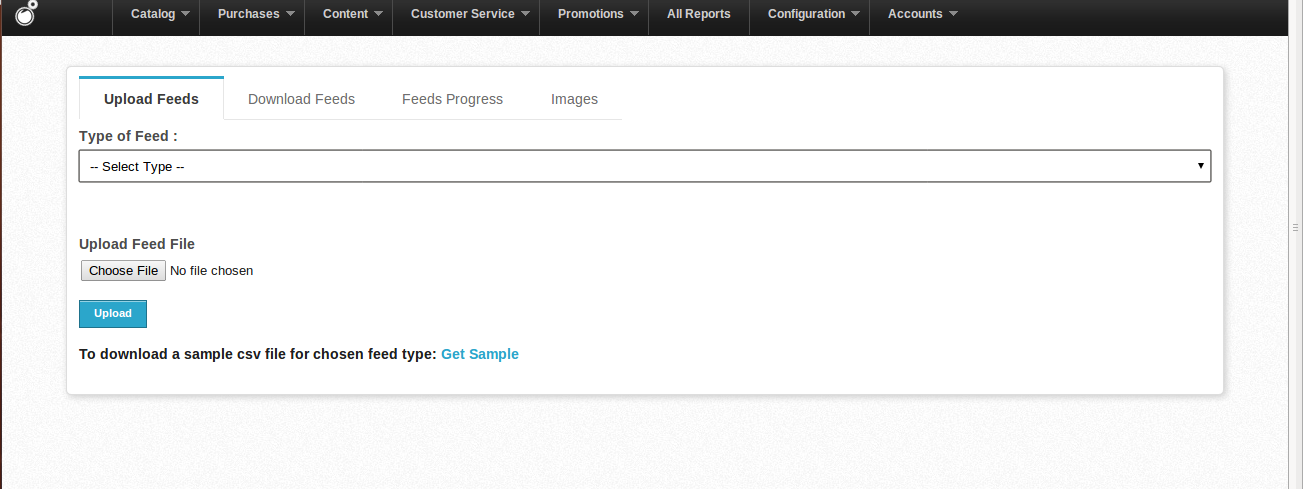
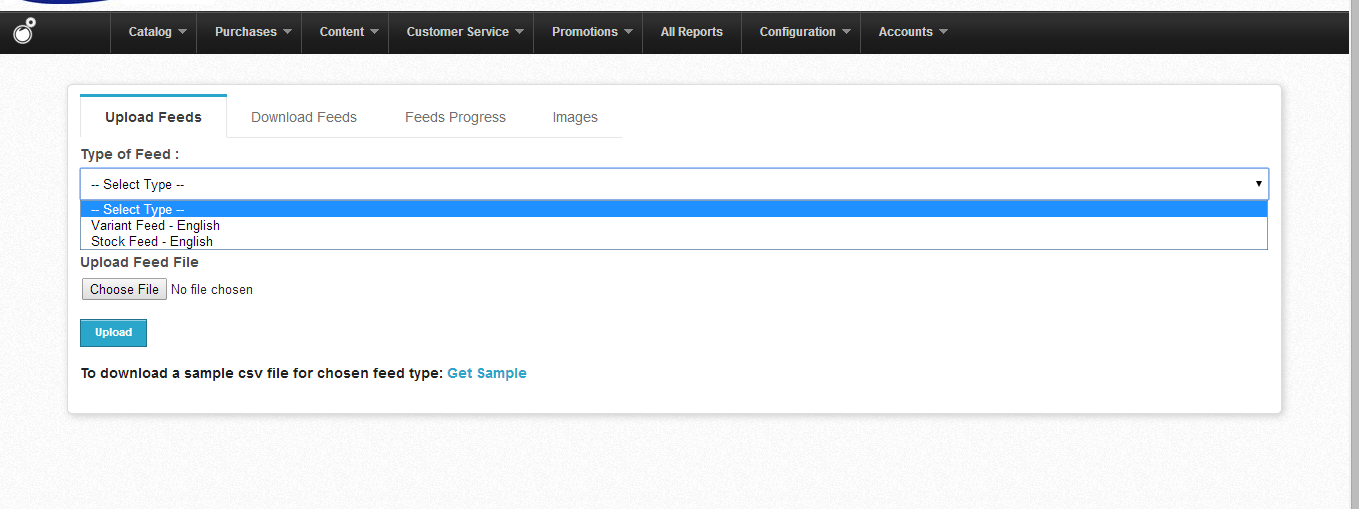
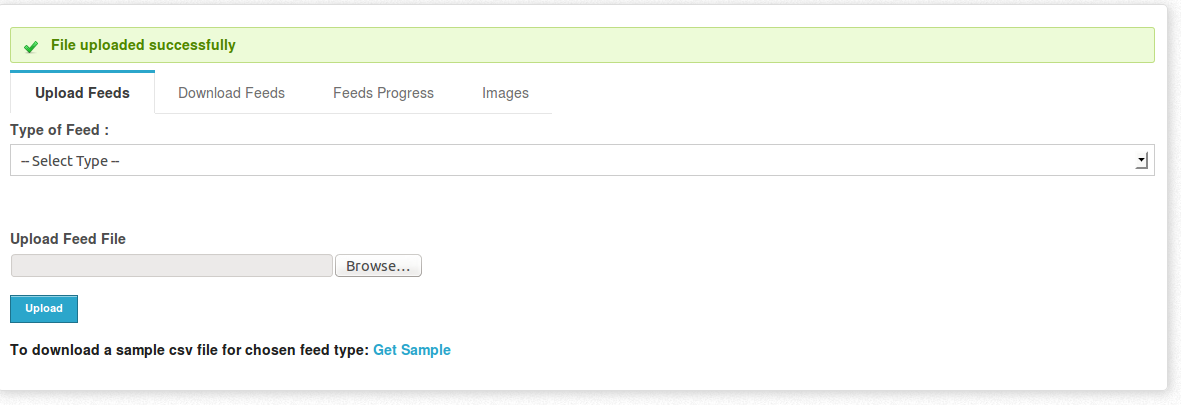
Choose Your Feed Type & click on upload :
- Variant Feed - For uploading products csv
- Stock Feed - For uploading stock file
If you have selected Variant feed then click on Browse & choose your catalog file , which you want to upload
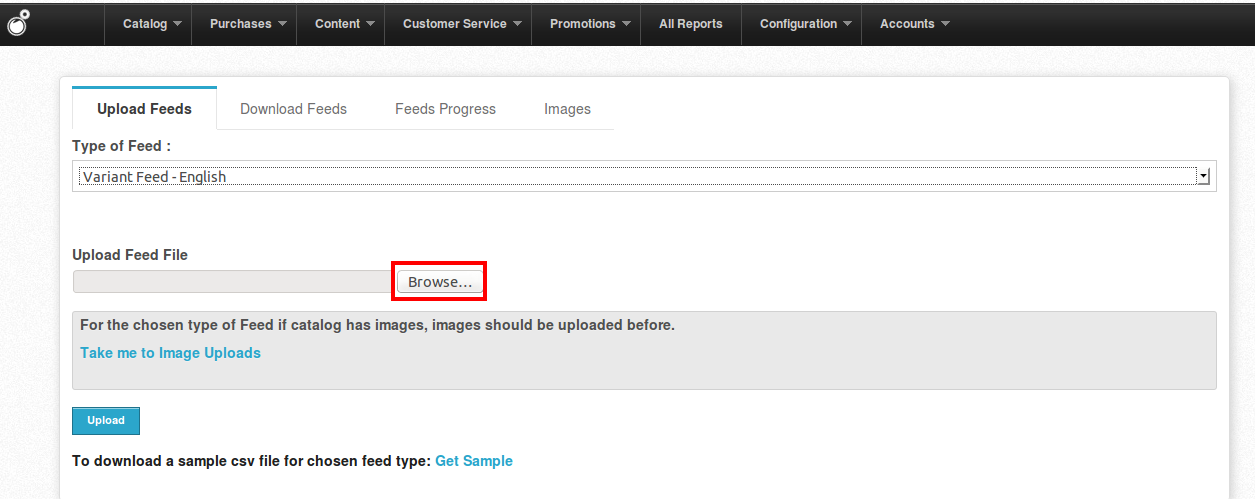
To Download sample file Click on Get Sample. A sample CSV file is downloaded.
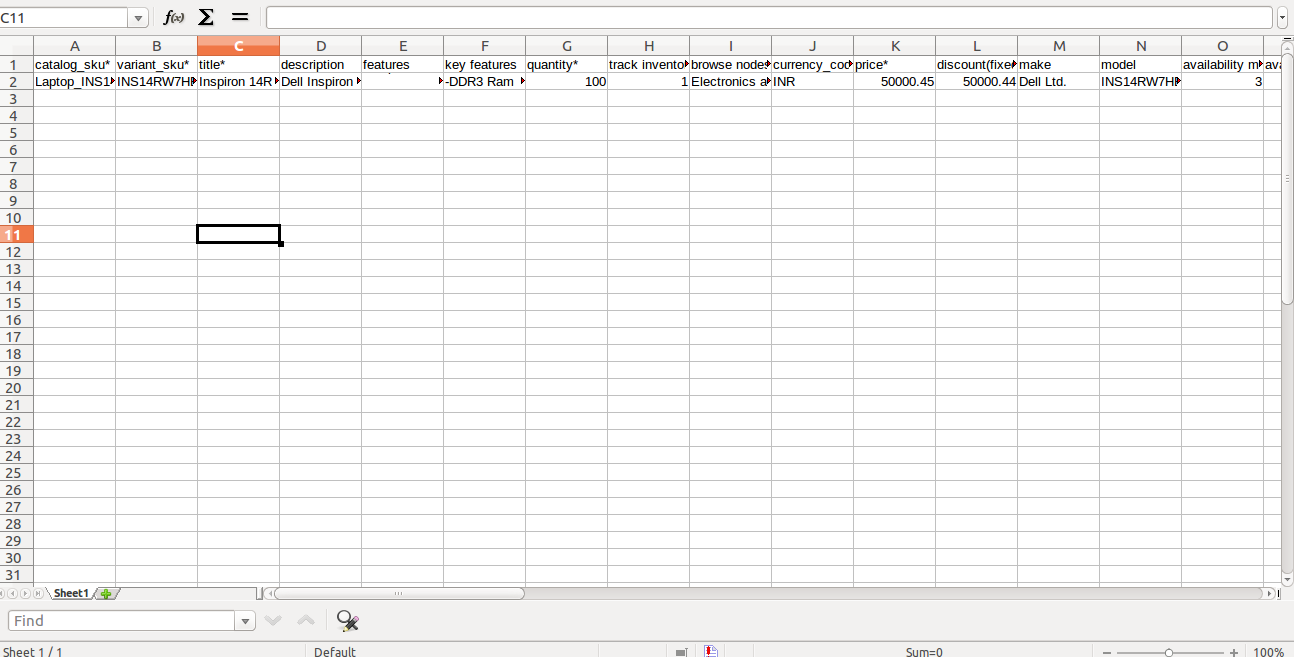
The CSV file downloaded can be opened in Microsoft Excel format. The excel sheet contains different fields which need to be filled up with details about the product such as:
| CATALOG_SKU: |
SKU (Stock Keeping Unit) is a Unique Identifier of each product in the catalog. |
||||||||||||
| Variant_SKU: |
Enter a unique SKU for for each variant different then catalog SKU. For a product with three variants the catalog SKU will remain same while the variant SKU will be unique for each variant. |
||||||||||||
| Title: |
Enter the product name |
||||||||||||
| Description: |
Give brief description of the product. Don’t use any special |
||||||||||||
| Features: |
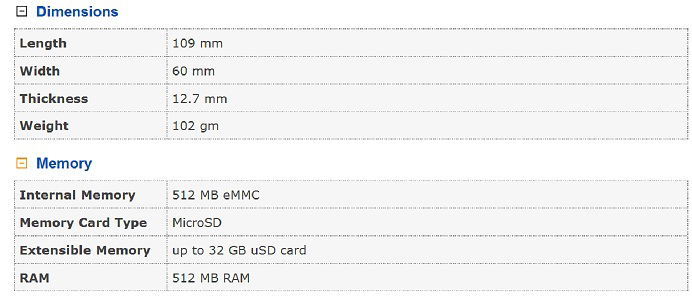
Enter the features of the product. Features tell us what the product is and what all facility it gives to us. It shows particular product have various features. Data in this column appear in a tabular format and has to be entered in following format:
Output:-
|
||||||||||||
| Key - Features |
Key Features will be displayed above the Description. Display unique features of a product just above the description with the help of the bullet points. 5 key features per product is allowed and each key features should not contain more than 256 characters. |
||||||||||||
| QUANTITY |
Enter the product quantity available in your store. |
||||||||||||
| TRACK INVENTORY |
Keeps track of the inventory and as soon as product goes out of stock, the same is displayed on the store. This cell takes only two values : 1 to track Inventory, 0 for not tracking |
||||||||||||
| Browse nodes: | Enter the category, sub category here Mention,Under which category and sub category the Product will be Displayed. Example: Electronics OR Electronics:Mobiles OR Electronics:Mobiles:Samsung [ i.e. Category OR Category:Sub-category OR Category:Sub-category:Sub-category] (Be sure, you fill the browse node name exactly same as that in your webstore browse category. For eg: “Electronics:Mobiles:Samsung” – be sure you to type ‘Mobiles’ and not ‘Mobile’, this will create a new browse node itself) |
||||||||||||
| Currency_code |
Insert INR as currency code |
||||||||||||
| PRICE |
Enter the product price. |
||||||||||||
| DISCOUNT |
Enter the discount on the product fixed (Amount) only. (no percentage) |
||||||||||||
| Make |
Insert Brand name or company name |
||||||||||||
| Model |
Insert Model number of the product |
||||||||||||
| AVAILABILITY(Min&Max) |
Enter the time span for the delivering the product to the customer. Like if it takes 2 to 5 days for shipping the product then mention 2 in availability (min) and 5 in availability (max). |
||||||||||||
| IMAGES |
Give the image name chosen for the product with jpg extension. Ex.Greenkurti.jpg. Multiple image names can be separated by comma “, “ [ png format is not recommended for the image ] |
||||||||||||
| WARRANTY |
Give the time period for the product warranty. (If Any) |
||||||||||||
| SHIPPING COST |
Enter the cost you will charge for shipping the product to the customer. |
||||||||||||
| NOTES |
Notes are only for the store owner’s reference. |
||||||||||||
| Badges |
Special Information to be shown on SDP. This is a special feature not available by default(Paid Feature) |
||||||||||||
| Video Url |
Enter the URL of the video uploaded on some other site (YouTube etc.) |
||||||||||||
| Boost |
If you want to set priority of your product display on the category page then you can do that by giving them numbers between 1 to 10 10 indicates the higher priority( product displays on the 1st page of your category) & 1 indicates the lower priority ( product displays in the last page of category) |
||||||||||||
| catalog_option.1.name & catalog_option.2.name |
If you have variants into your product like color, size etc , then in catalog_option.1.name column insert Size & in catalog_option.2.name insert Color |
||||||||||||
| catalog_option.1.value & catalog_option.2.value |
If you have variants into your product like color, size etc , then in catalog_option.1.value column insert XL & in catalog_option.2.value insert Red |
||||||||||||
| tags1.name & tags1.value |
Tags are used for creating filters on your store . Enter the product filter type in column tags1.name & its value in tags.value column. Example : If you want to create filter of Processor type then |
||||||||||||
| cod |
If you want to make cod enable for particular products then insert 1 otherwise insert 0 |
||||||||||||
| seo_title |
Title tags are often used on search engine results pages to display preview snippets for a given page, and are important both for SEO and social sharing. |
||||||||||||
| seo_metatags |
seo metatags are officially page data tags. The text in these tags is not displayed, but parsable and tells the browsers (or other web services) specific information about the page |
||||||||||||
| catalog_status |
If you want to disable / hide particular products from your site then insert Purge to disable them or else insert Active to make them visible on your store For the first time upload please keep catalog status as active. |
||||||||||||
| variant_status |
If you want to disable / hide particular product’s variat from your site then insert Purge to disable them or else insert Active to make them visible on your store. For the first time upload please keep variant status as active. |
To fill product details in the CSV file:
Open the CSV file downloaded to your computer in Microsoft Excel and populate your product catalog in the defined format
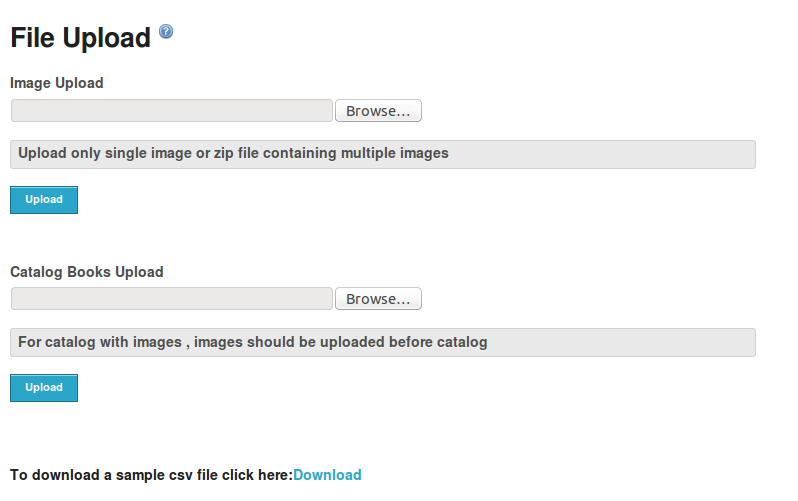
Before uploading catalog file , images should be uploaded first then the csv
Image Upload
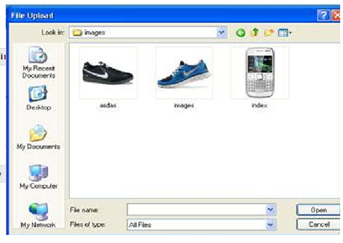
Browse Image
After the bulk image upload is over, you need to upload the excel file for catalog bulk upload. To do this:
- Click on Browse to choose File.
- Select the relevant CSV file on the system and click Open.
- Click Upload.
A message stating ‘File uploaded successfully’ appears.
How to download the catalog / stock of my products?
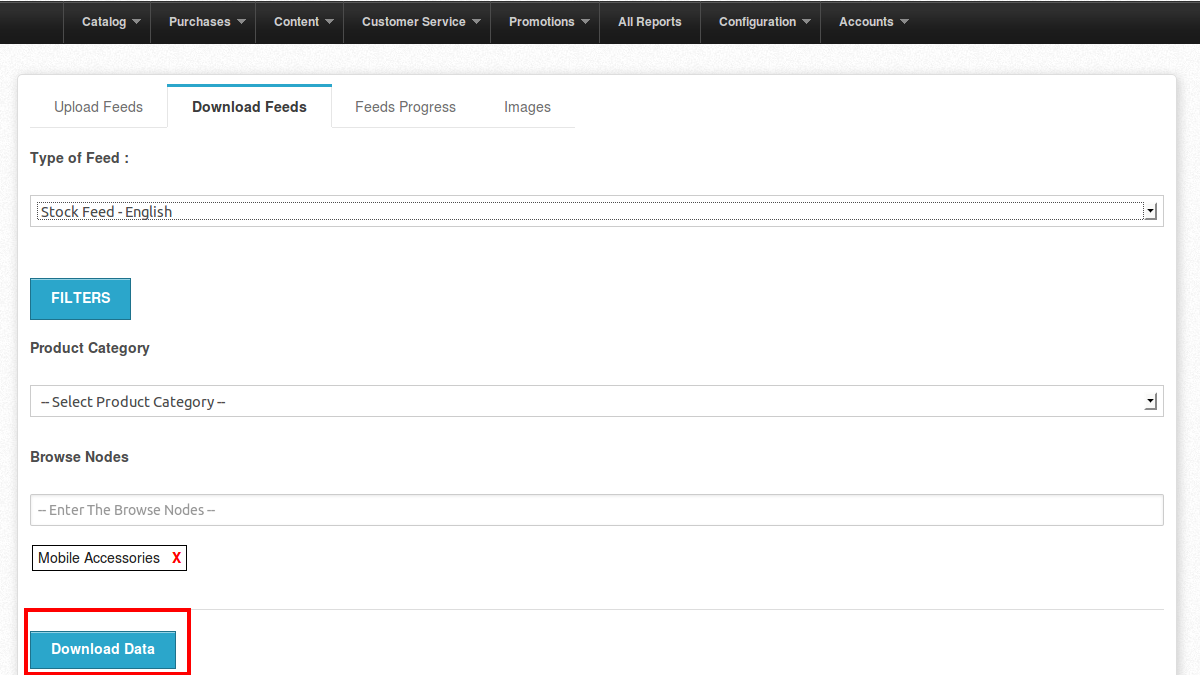
Go to download feeds and Select the type of feed i.e Stock feed
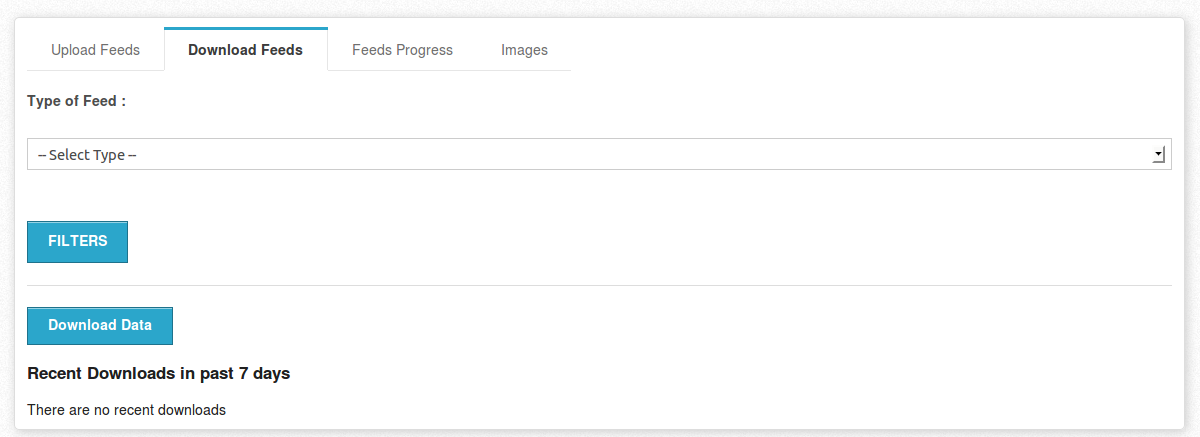
Download the stock file based on Filters i.e based on particular category, browse node, all products or even based on their status.
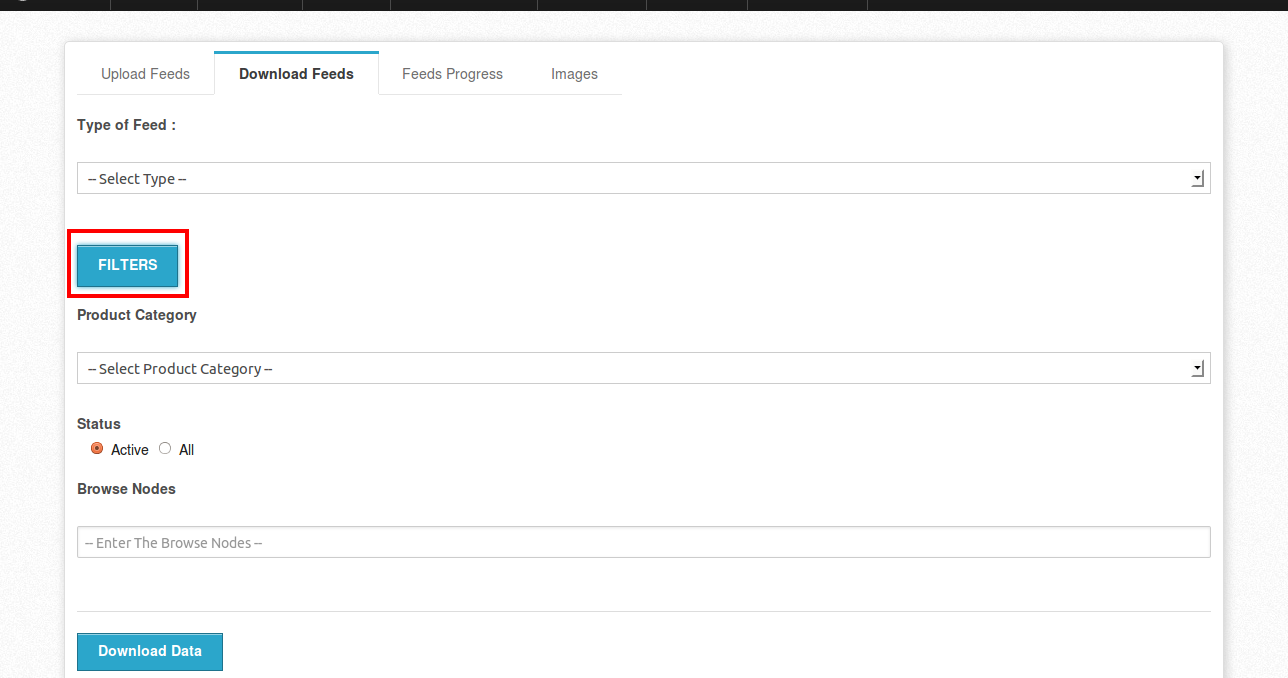
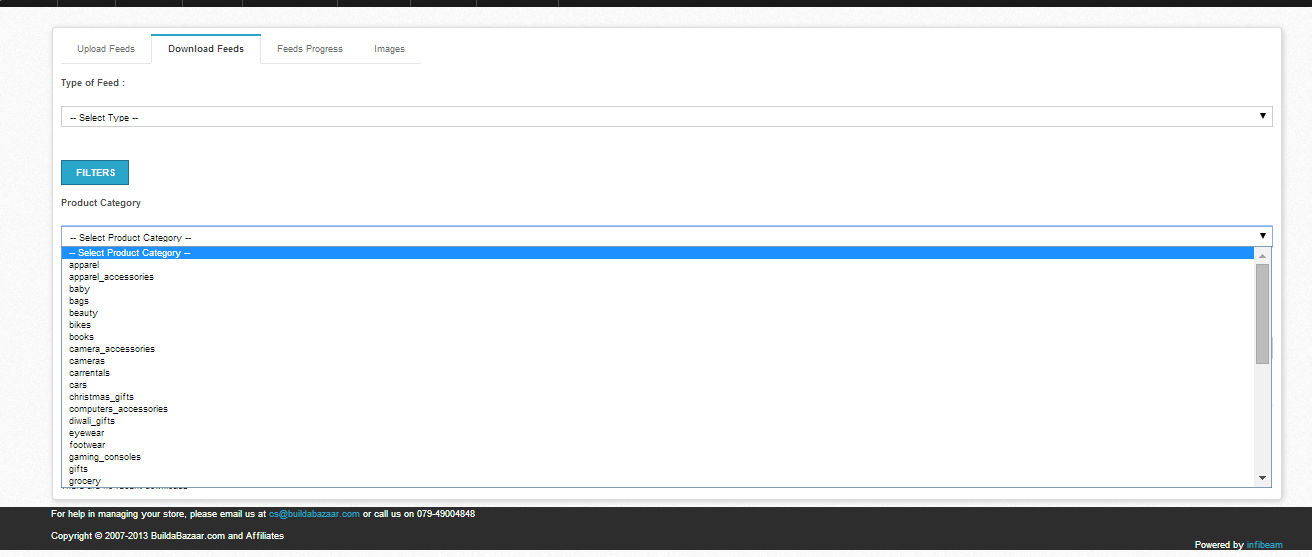
Select the category from the drop-down and then select the status
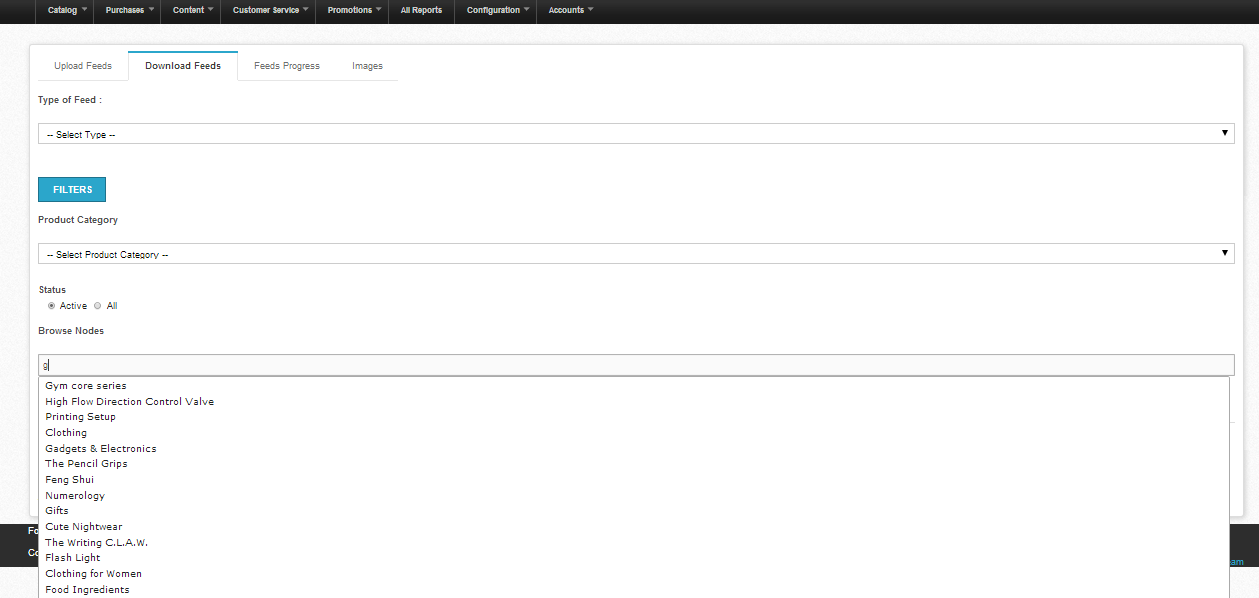
Type-in the name of the browse node and an auto search result would appear based on the name you type. Now select the browse node you want.
Click on “ Download data “ to download the file
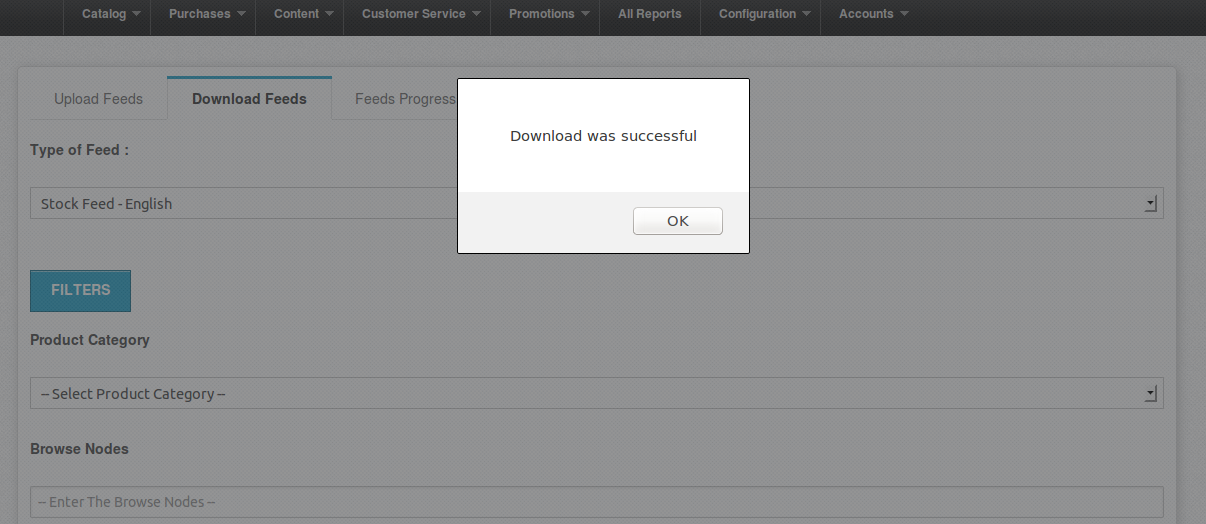
A success message would be displayed once the file is downloaded and you can save the file.
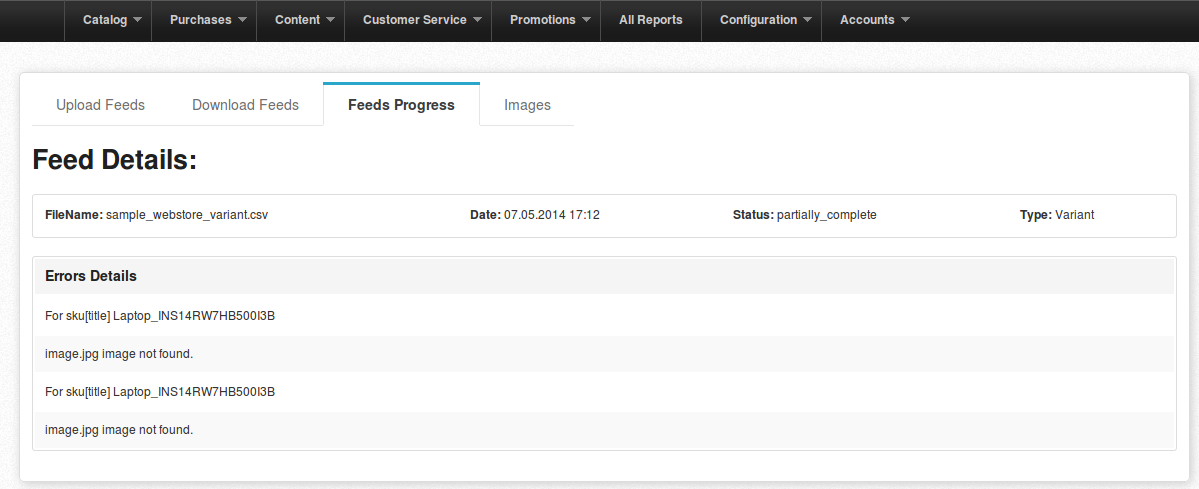
How to check the progress of the uploaded feeds?
Check whether the uploaded file has been uploaded without any error or not
To know the feed states. Just click on “Feed Progress” tab. All the details with file name and status will be available under this tab.
The status “Complete” means file has been uploaded without any error.
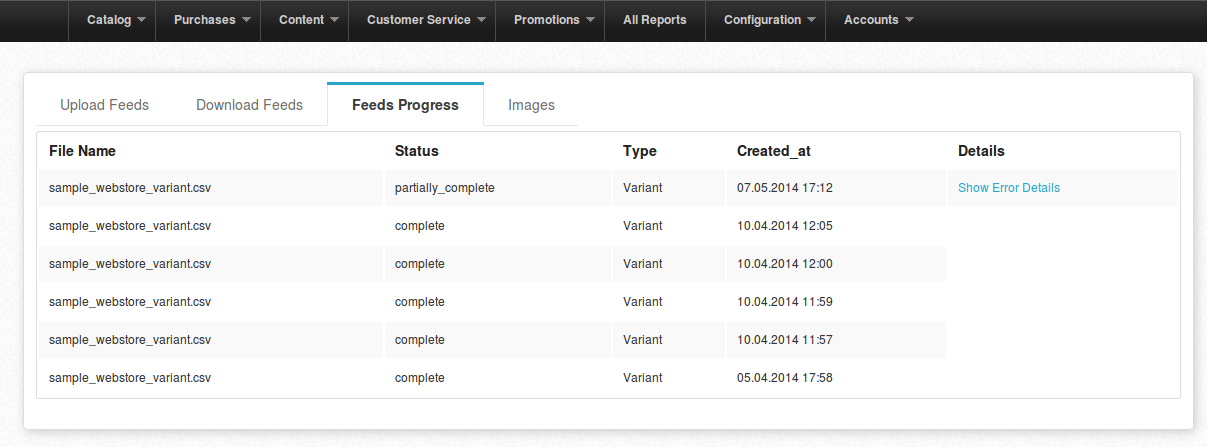
If the file you uploaded shows the status “Partially complete” then click on “show error details” to know the error
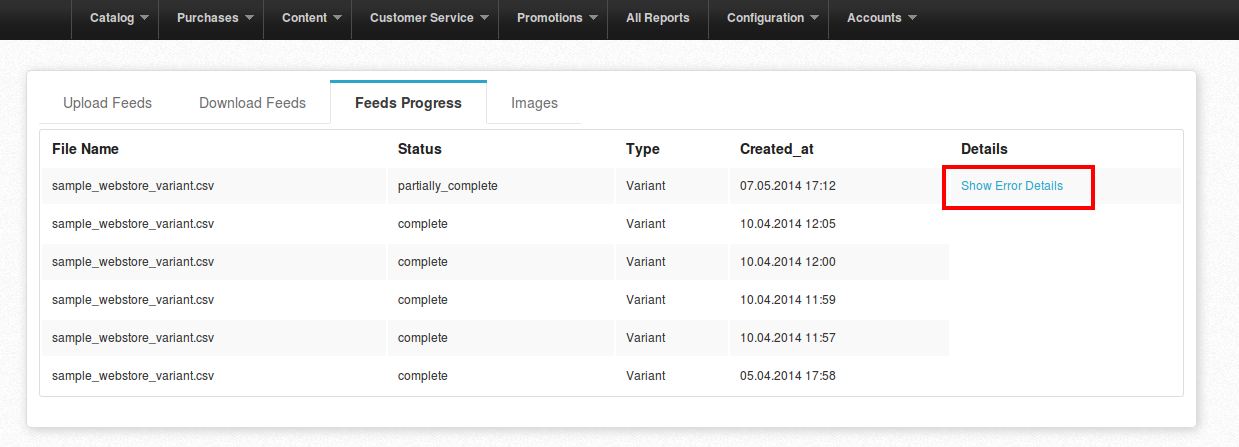
When you click on “Show error details”, it will take you to the page containing the details and you can know the error and correct the same.
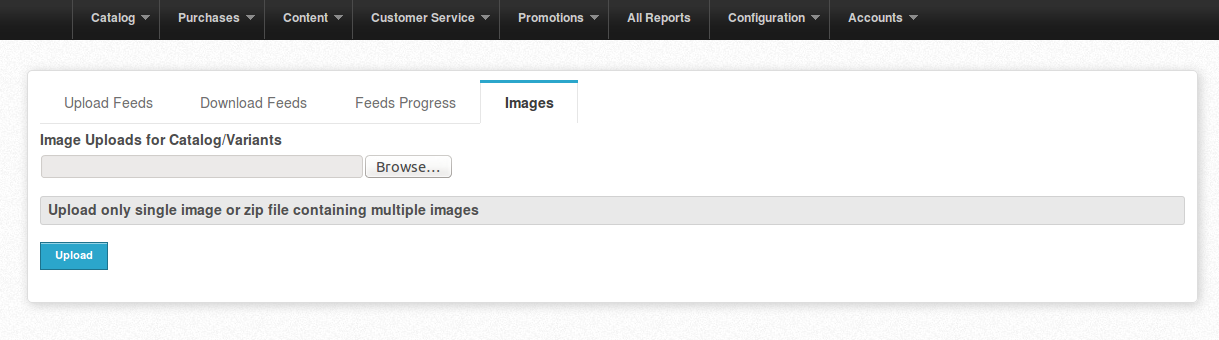
How to upload the images of the catalog in bulk?
You can upload images for the CSV from the Images tab
From the folders on your system, choose the relevant images as a zip file or select one image at a time and click Open. Depending on the size of the zip file, the upload can also take several minutes.(Max upload size 50MB)
Click Upload. A message stating ‘File uploaded successfully’ appears once the file is uploaded.

How to add the books catalog in bulk?
To use bulk upload option for uploading the catalog, do as follows:
Go to Catalog > Bulk Upload > Books Catalog. You have an option to download stock information and fill details and upload it back to the web store. To download stock information:
In the Download Stock page, click Download Stock.
File Upload Page opens, now download the sample CSV file.
The CSV file downloaded is in Microsoft Excel Format and contains different fields which need to be filled up with details about the product such as:
-> Ean: International Article Number/ European Article Number is an unique BAR code used for marking individual retail items.
-> ISBN: International Standard Book Number is a unique numeric commercial book identifier. Enter the unique numeric code.
-> Title: Enter the name of the book.
-> Description: Enter the brief description about the book.
-> Browse Nodes: Enter the appropriate category for each and every product.
-> Num Pages: Enter the total number of pages in the book/
-> Language: Enter the language of the book
-> Author: Enter the name of the author/writer
-> Publisher: Enter the name of the publisher.
-> Binding: Please specify the type of binding (Hardcover or Paperback)
-> Quantity: Enter the quantity available in the store.
-> Price: Enter the price of the book.
-> Discount (Fixed): Enter the discount offered on the book.
-> Availability_min: Enter the minimum number of days required for delivery of the product.
-> Availability_max: Enter the maximum number of days required for delivery of the product.
-> Shipping Cost: Enter the cost involved in delivering a book to the customer, if applicable.
-> Warranty: Enter the time period for which the book is available for warranty. Also include details such as type of warranty, contact details for warranty support, etc.
Notes: Enter any notes which are limited for warranty support, and so on. Track Inventory: Enter the stock position (number of items available) for the particular book. Images: Enter the image name chosen for the book.
Fill product details in the CSV file:
Open the CSV file downloaded to your computer and populate your books catalog in the defined format.
Also fill in the corresponding image file name against each book and save the file. Once the CSV file is completed, the books images need to be uploaded to the web store data base as a zip file or one at a time. To do this:
In the File Upload page, click Choose File.
From the folders on your system, choose the relevant image as a zip file or select one image at a time and click open. Depending on the size of the zip file, the upload can also take several minutes.
Click Upload. A message stating 'File uploaded successfully' appears.
After the bulk image upload is over, you need to upload the excel file for books catalog bulk upload. To do this:
- On the successful File Upload page, Click Choose File.
- Select the relevant CSV file from your system and click Open.
- Click Upload
A message stating 'File Uploaded Successfully' appears.


