NAVIGATION WIDGET
The Navigation widget enables the store owners to define a tree based navigation structure for different products. This navigation structure is different from the browse node based navigation structure. The browse node based navigation structure is defined automatically by the platform, while adding a navigation widget allows you to customize the navigation structure of your webstore.
The navigation widget can be added under any of the sections present in the webstore home page.
- Log in to administrator mode and click the spanner symbol. The options to manage widgets appear.
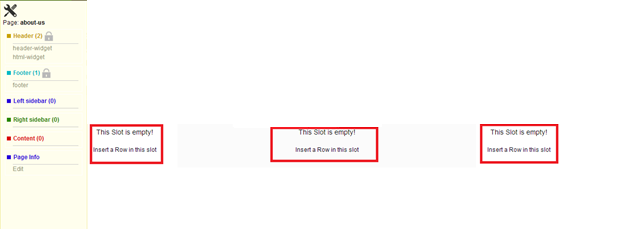
- As displayed in the above image click on “Insert a Row in this slot” to create column in the section (i.e. Left side bar, content & right side bar) you want to add a widget.
- After adding a row you can further create multiple columns in a particular row as shown in below image.
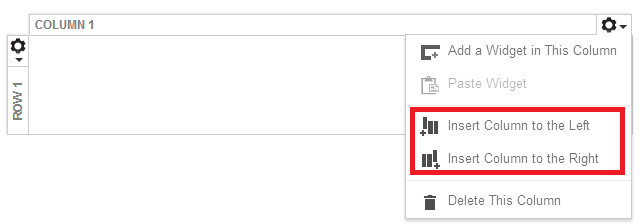
- After adding the column click on “Add a widget in this column” to add the NAVIGATION widget. If you do not want to add columns then you can directly click on “Add a widget in this column” to add NAVIGATION widget in row.
- Once you click on “Add a widget in this column” you will see a dialogue box similar to the one shown below from where you can select the widget of your choice.

- Click on Add a Navigation Widget. The Navigation Widget dialog box opens.
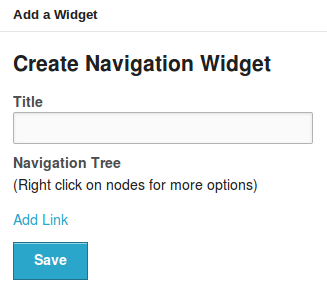
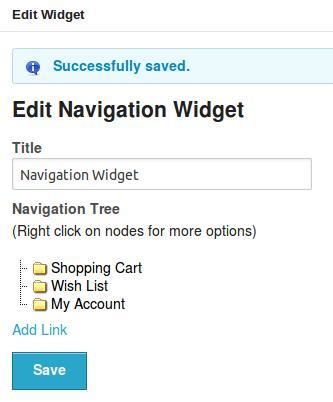
- Enter a title in the Title field
- Click Save. A message “Successfully Created Navigation Widget. Start Editing!” appears.

Adding new nodes
You can add any number of new nodes and modify them in the navigation tree section. The nodes created will define the product category in the navigation widget.
To create a new node:
- In the Navigation Tree, click Add Link. A new folder with the name New Node is created.
- Right click on New Node to view the options to Create, Rename, Delete, and Edit Link.

- Click on the appropriate options to make changes to the properties of the new node.
To associate a node to a page:
- Any page can be associated to a node by means of its URL.
- To link to a specific product, click on the desired product to view and copy the link from the URL box.
Click on Edit Link. The Edit Link dialog box appears.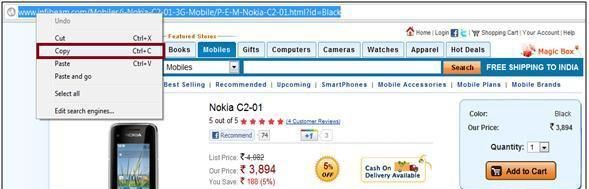
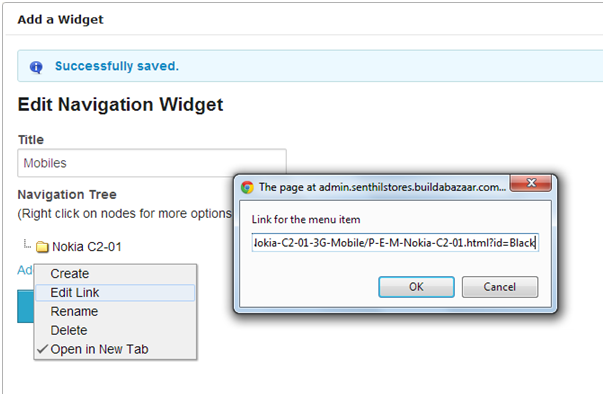
- Paste the link in the Link for the Menu Item field. The link to access the product on navigation widget is created.
- Click Save. The message “Successfully Saved” appears.
- Close the Navigation dialog box. The web page reloads and the created widget is visible. The widget created is displayed on the webstore. You have the options to edit, delete or enable the Navigation widget. To enable a Navigation widget:
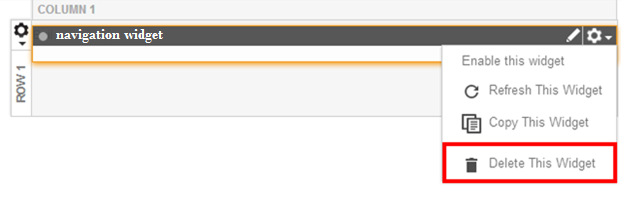
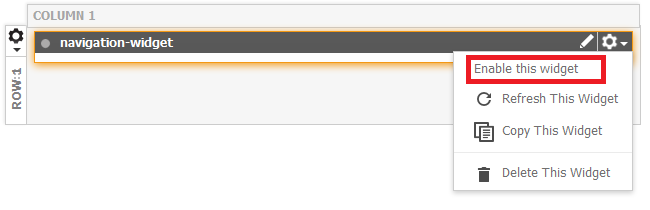
- Once the page reloads take your cursor to the NAVIGATION widget so that you can see the editor. Click on the settings icon which is in line of the navigation widget where you can see the option of enable this widget. Click on “enable this widget”.
Note: Unless you enable the Navigation widget, the widget will not be visible to the customer.
- Once the page reloads take your cursor to the NAVIGATION widget so that you can see the editor. Click on the settings icon which is in line of the navigation widget where you can see the option of enable this widget. Click on “enable this widget”.
- If you want to edit an already added NAVIGATION widget then click on the Pen icon right beside the settings icon. This will allow you to edit the already added NAVIGATION widget.
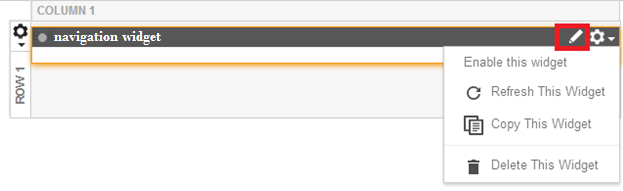
- If you want to delete an already added NAVIGATION widget then click on the settings icon which is in line of the banner navigation widget where you can see the option of delete this widget. Click on “delete this widget”.